confusion, mistakes and linear workflow
I was fiddling with some old files a couple of days ago, then decided to take some renders into Gimp, and play with them a bit more.
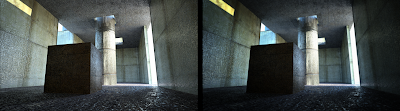
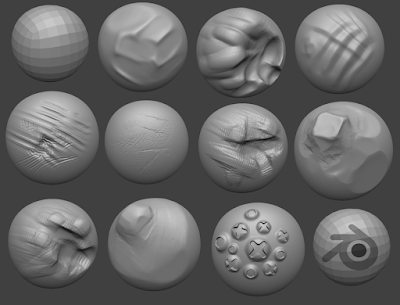
This render is a material test rendered with Indigo,the one on the left is the original, and the right one came out of Gimp after applying some modifications.
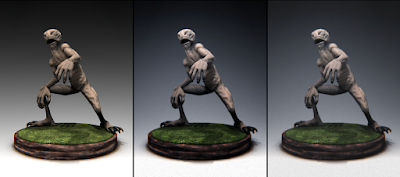
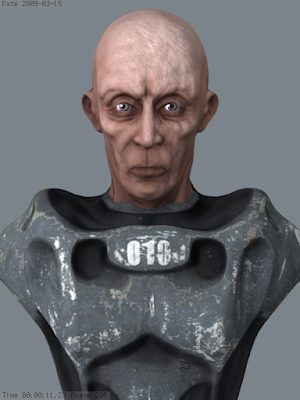
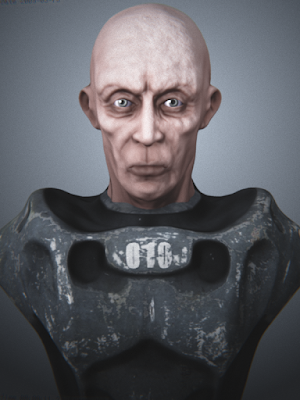
This was modeled by a friend of mine, I've textured it (using Yo Frankie's textures for the base thing), then lighted and rendered a couple of turntables. The first pic on the left is what came out of blender, the other pair of images are the result of applying the same process used for the materials test to this image.
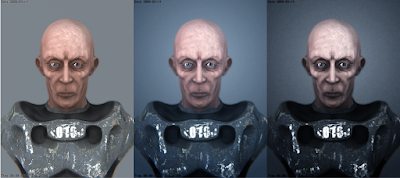
But, it all started with this render. The picture on the left is blender's internal renderer output. I wanted to add some vignetting to the image and along came some noise and a blue tint.
I've been reading this thread on photorealism tricks over at cgtalk, and decided to put my goofy hands into some work, even though some things, like the noise, may be a mistake.
So I've fired up Gimp and edited the three different renders above. I was quite satisfied with the outcome.
Until I've read this thread at blenderartists today. I've been doing it all wrong. But, first things first.
Six months ago or so, I've discovered gamma correction and linear workflow concepts thanks to this other thread at blenderartists, and not long later I've read this other thread at cgtalk. The results of all this reading was confusion. Lots of changes in my workflow and lots and lots of test renders later, I'm still confused. But seem to have got some things right after all.
So, I was doing it all wrong, I've said before. The first thing I ended up realizing is that gamma correction should be the last thing to do before saving your image to a non-linear file format; following this, all colour correction and editing/compositing must be done before applying gamma correction. Since all the renders above where already gamma corrected before opening them with Gimp, some even color corrected inside Blender, but after gamma node, they're all wrong.
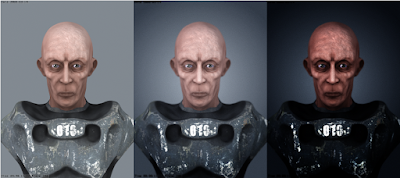
So I've decided to do another round. I've rendered another image without any compositing in Blender, opened it with Gimp to do the vignetting and other stuff, then gamma corrected (right side image). It looks dark and very saturated.
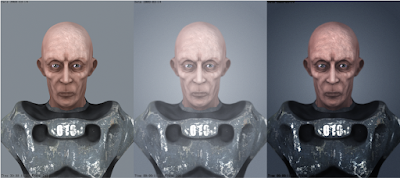
To counter-weight the gamma correction I've increased brightness and decreased contrast (middle image) before going for the gamma corrected image. It looks a bit more like what I've had in mind.
But yet, surely hidden amongst many other, there is another mistake I've been doing.
Up to this point I've been working all the time with .png files. But, if I understood it alright, images that are to be colour and gamma corrected should be saved in a linear space format such as OpenEXR. The things is, Gimp can't open .exr files and I don't feel that much confident with Blender Nodes, but saving in .exr and editing it within Blender seemed like the only way.
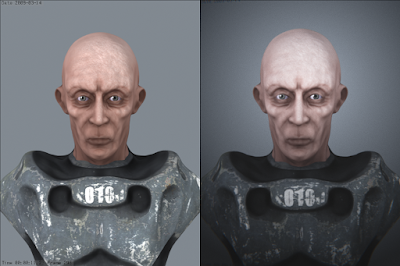
And that's what I've done, above is the raw render, and the result of the compositor, trying to match what I've already done with Gimp.
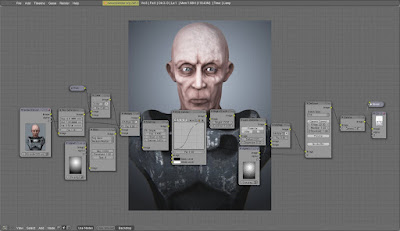
This is the node setup used on the .exr file. I feel like I've played a lot of dirty tricks to get what I wanted, but I can't really tell if I'm right or wrong.
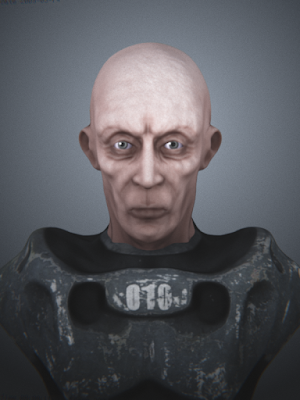
This image is what I've got up to this point, and using the same lights setup I've recorded the video below of the model in realtime with Blender's Game Engine and glsl materials.
blender game engine test from john doe on Vimeo.
Finally, I've decided to get rid of the messy lighting rig, and changed it all for one area light (the only light in blender that has a gamma slider in the settings panel). Above is raw render, and below is the post-processed one.
On a final note, I'll add that I'm still quite unsure about what exactly "a linear workflow" means, but it seems I'm slowly getting there, even though I'll think differently tomorrow.
Linear workflow links:
3dlight
linear workflow tutorial
linear workflow in blender
linear workflow at mke3.net

This render is a material test rendered with Indigo,the one on the left is the original, and the right one came out of Gimp after applying some modifications.

This was modeled by a friend of mine, I've textured it (using Yo Frankie's textures for the base thing), then lighted and rendered a couple of turntables. The first pic on the left is what came out of blender, the other pair of images are the result of applying the same process used for the materials test to this image.

But, it all started with this render. The picture on the left is blender's internal renderer output. I wanted to add some vignetting to the image and along came some noise and a blue tint.
I've been reading this thread on photorealism tricks over at cgtalk, and decided to put my goofy hands into some work, even though some things, like the noise, may be a mistake.
So I've fired up Gimp and edited the three different renders above. I was quite satisfied with the outcome.
Until I've read this thread at blenderartists today. I've been doing it all wrong. But, first things first.
Six months ago or so, I've discovered gamma correction and linear workflow concepts thanks to this other thread at blenderartists, and not long later I've read this other thread at cgtalk. The results of all this reading was confusion. Lots of changes in my workflow and lots and lots of test renders later, I'm still confused. But seem to have got some things right after all.
So, I was doing it all wrong, I've said before. The first thing I ended up realizing is that gamma correction should be the last thing to do before saving your image to a non-linear file format; following this, all colour correction and editing/compositing must be done before applying gamma correction. Since all the renders above where already gamma corrected before opening them with Gimp, some even color corrected inside Blender, but after gamma node, they're all wrong.

So I've decided to do another round. I've rendered another image without any compositing in Blender, opened it with Gimp to do the vignetting and other stuff, then gamma corrected (right side image). It looks dark and very saturated.

To counter-weight the gamma correction I've increased brightness and decreased contrast (middle image) before going for the gamma corrected image. It looks a bit more like what I've had in mind.
But yet, surely hidden amongst many other, there is another mistake I've been doing.
Up to this point I've been working all the time with .png files. But, if I understood it alright, images that are to be colour and gamma corrected should be saved in a linear space format such as OpenEXR. The things is, Gimp can't open .exr files and I don't feel that much confident with Blender Nodes, but saving in .exr and editing it within Blender seemed like the only way.

And that's what I've done, above is the raw render, and the result of the compositor, trying to match what I've already done with Gimp.

This is the node setup used on the .exr file. I feel like I've played a lot of dirty tricks to get what I wanted, but I can't really tell if I'm right or wrong.

This image is what I've got up to this point, and using the same lights setup I've recorded the video below of the model in realtime with Blender's Game Engine and glsl materials.
blender game engine test from john doe on Vimeo.

Finally, I've decided to get rid of the messy lighting rig, and changed it all for one area light (the only light in blender that has a gamma slider in the settings panel). Above is raw render, and below is the post-processed one.

On a final note, I'll add that I'm still quite unsure about what exactly "a linear workflow" means, but it seems I'm slowly getting there, even though I'll think differently tomorrow.
Linear workflow links:
3dlight
linear workflow tutorial
linear workflow in blender
linear workflow at mke3.net


Comments
Post a Comment